🎉 Introduction
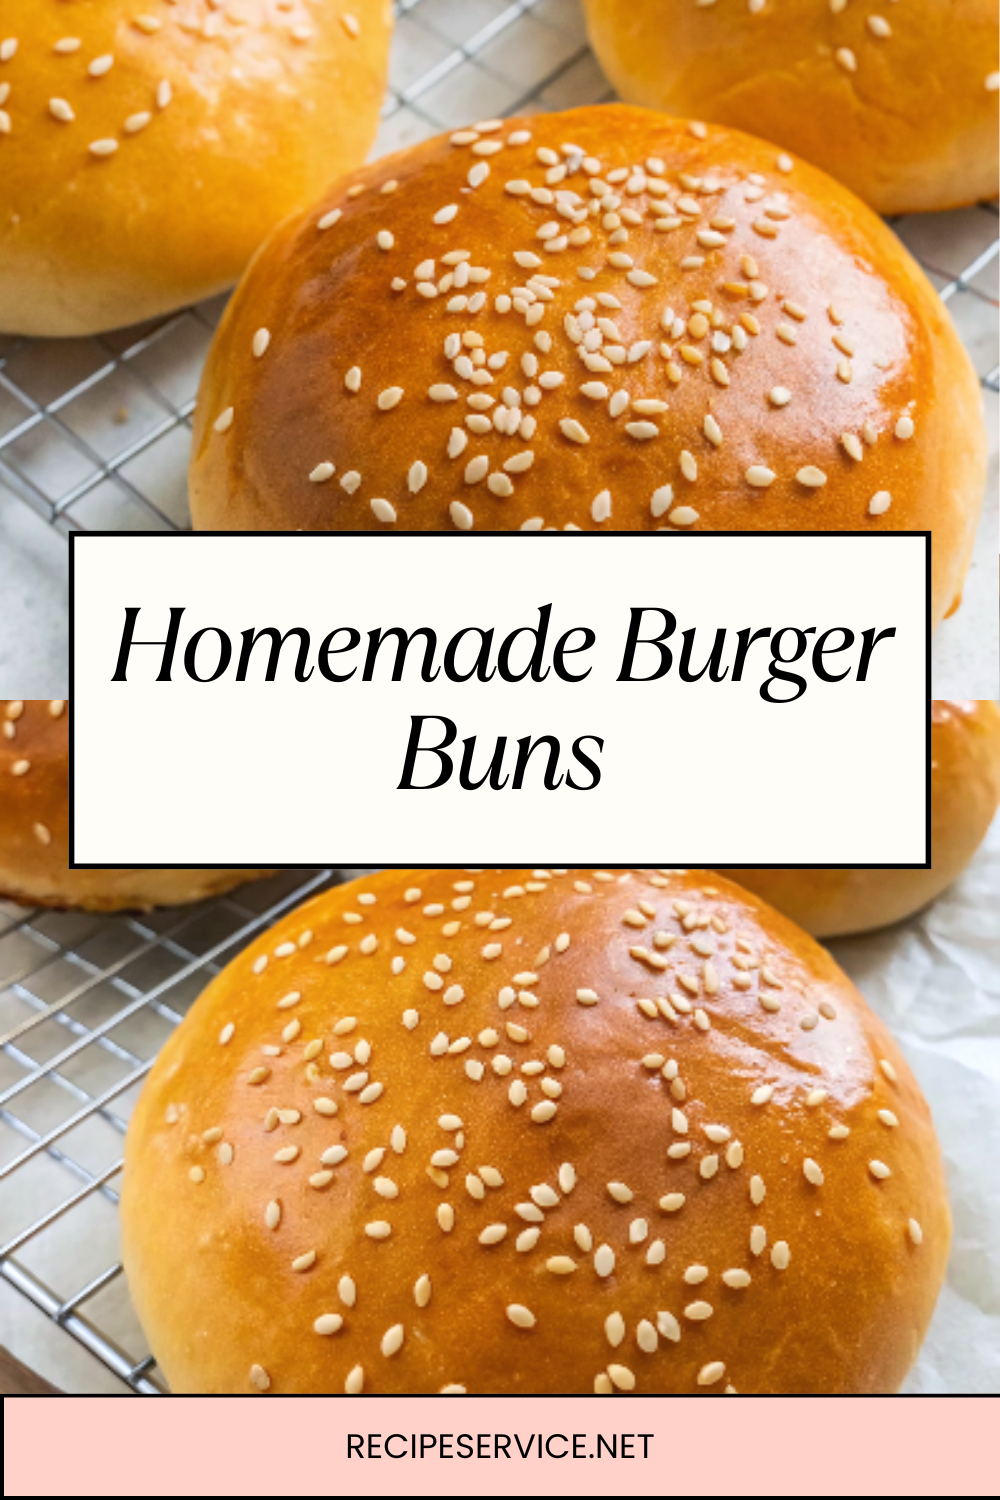
There’s nothing quite like the satisfaction of biting into a burger with a freshly baked homemade bun. Unlike store-bought versions, homemade burger buns are soft, fluffy, and have that perfect golden crust that holds up to all your favorite burger fillings—whether you love classic beef patties, grilled chicken, or plant-based alternatives.
The magic of this recipe lies in its texture: light and airy inside, yet sturdy enough to hold juicy fillings without falling apart. The subtle hint of sweetness pairs beautifully with savory burger toppings, making every bite a balanced delight. Plus, you can customize the shape, size, and even add toppings like sesame seeds to suit your style.
🧰 Equipment Needed
- Mixing bowls (large and medium)
- Measuring cups & spoons
- Stand mixer with dough hook (optional but recommended)
- Whisk
- Wooden spoon or spatula
- Baking sheet
- Parchment paper
- Plastic wrap or clean kitchen towel
- Pastry brush (for egg wash)
- Cooling rack
🛒 Ingredients
Fresh Products:
- 1 egg, large (for dough)
- 1 egg yolk (for egg wash)
Culinary Aids & Spices:
- 3 ½ cups bread flour (or all-purpose flour)
- 1 tbsp sugar
- 1 tsp salt
- 2 ¼ tsp instant yeast (1 packet)
Liquids:
- 1 cup warm water (110°F / 43°C)
Oils & Fats:
- 3 tbsp unsalted butter (softened)
- 2 tbsp vegetable oil
Optional Toppings:
- 2 tbsp sesame seeds or poppy seeds
👩🍳 Directions
Step 1: Activate the Yeast
- In a large bowl, combine warm water, sugar, and instant yeast.
- Let sit for 5–10 minutes until foamy.
Step 2: Mix the Dough
- Add egg, butter, and vegetable oil to the yeast mixture.
- Gradually mix in flour and salt, stirring until a shaggy dough forms.
Step 3: Knead
- Knead by hand for 8–10 minutes or use a stand mixer with dough hook for 5–6 minutes until smooth and elastic.
- If dough is too sticky, add a little extra flour, but avoid adding too much to keep buns soft.
Step 4: First Rise
- Shape dough into a ball and place in a greased bowl.
- Cover with a kitchen towel or plastic wrap.
- Let rise in a warm place for 1–1.5 hours, or until doubled in size.
Step 5: Shape the Buns
- Punch down the dough to release air.
- Divide into 8 equal pieces for standard buns (or 10–12 for sliders).
- Shape each piece into a smooth ball and flatten slightly.
Step 6: Second Rise
- Arrange buns on a parchment-lined baking sheet, leaving space between them.
- Cover and let rise for 30–40 minutes until puffy.
Step 7: Egg Wash & Toppings
- Preheat oven to 190°C (375°F).
- Whisk egg yolk with 1 tbsp water.
- Brush over buns for a golden finish.
- Sprinkle with sesame seeds or poppy seeds if desired.
Step 8: Bake
- Bake for 15–18 minutes or until golden brown.
- Cool on a wire rack before slicing.
🍽️ Servings & Timing
- Servings: 8 standard buns
- Prep Time: 20 minutes
- Rise Time: 1 hour 30 minutes
- Bake Time: 15–18 minutes
- Total Time: ~2 hours 15 minutes
🧊 Storage & Reheating
Room Temperature:
- Store in an airtight container for up to 3 days.
Freezer:
- Freeze for up to 2 months; thaw at room temperature.
Reheating:
- Warm in the oven at 150°C (300°F) for 5 minutes or microwave for 15 seconds.
🥄 Variations
- Whole Wheat Buns: Replace half the flour with whole wheat flour.
- Garlic Butter Buns: Brush with garlic butter after baking.
- Cheese-Topped Buns: Add shredded cheddar before baking.
- Mini Slider Buns: Shape into smaller portions for party-sized burgers.
- Sweet Burger Buns: Increase sugar slightly for a brioche-like flavor.
- Seed Mix Topping: Use a blend of sesame, flax, and sunflower seeds.
❓ 10 FAQs
1. Can I make the dough ahead of time?
Yes—refrigerate after the first rise and shape the next day.
2. Can I use active dry yeast instead of instant yeast?
Yes—proof in warm water for 5–10 minutes before mixing.
3. Can I use milk instead of water?
Yes—milk makes buns richer and softer.
4. How do I keep buns soft longer?
Store in an airtight container and avoid refrigeration unless freezing.
5. Can I make these vegan?
Yes—replace butter with plant-based margarine and egg with plant-based milk for the wash.
6. Can I double the recipe?
Yes—adjust rise times if needed.
7. Can I skip the egg wash?
Yes—but the buns will be paler and less shiny.
8. How do I make them gluten-free?
Use a gluten-free bread flour blend and add a binder like xanthan gum if not included.
9. Can I add herbs to the dough?
Yes—mix dried oregano, thyme, or rosemary into the dough for flavor.
10. Why are my buns dense?
Over-flouring, under-kneading, or short rising times can cause density.
🏁 Conclusion
These Homemade Burger Buns are the perfect upgrade for any burger night. Soft yet sturdy, slightly sweet yet neutral enough for any filling, they’ll make your homemade burgers taste like they came from a gourmet restaurant. With just a little time and a handful of pantry staples, you can say goodbye to store-bought buns forever.

Homemade Burger Buns | Soft, Fluffy & Perfect for Any Burger
Ingredients
Equipment
Method
- In a large bowl, combine warm water, sugar, and instant yeast.
- Let sit for 5–10 minutes until foamy.
- Add egg, butter, and vegetable oil to the yeast mixture.
- Gradually mix in flour and salt, stirring until a shaggy dough forms.
- Knead by hand for 8–10 minutes or use a stand mixer with dough hook for 5–6 minutes until smooth and elastic.
- If dough is too sticky, add a little extra flour, but avoid adding too much to keep buns soft.
- Shape dough into a ball and place in a greased bowl.
- Cover with a kitchen towel or plastic wrap.
- Let rise in a warm place for 1–1.5 hours, or until doubled in size.
- Punch down the dough to release air.
- Divide into 8 equal pieces for standard buns (or 10–12 for sliders).
- Shape each piece into a smooth ball and flatten slightly.
- Arrange buns on a parchment-lined baking sheet, leaving space between them.
- Cover and let rise for 30–40 minutes until puffy.
- Preheat oven to 190°C (375°F).
- Whisk egg yolk with 1 tbsp water.
- Brush over buns for a golden finish.
- Sprinkle with sesame seeds or poppy seeds if desired.
- Bake for 15–18 minutes or until golden brown.
- Cool on a wire rack before slicing.
Notes
Room Temperature: Store in an airtight container for up to 3 days. Freezer: Freeze for up to 2 months; thaw at room temperature. Reheating: Warm in the oven at 150°C (300°F) for 5 minutes or microwave for 15 seconds. 🥄 Variations
Whole Wheat Buns: Replace half the flour with whole wheat flour. Garlic Butter Buns: Brush with garlic butter after baking. Cheese-Topped Buns: Add shredded cheddar before baking. Mini Slider Buns: Shape into smaller portions for party-sized burgers. Sweet Burger Buns: Increase sugar slightly for a brioche-like flavor. Seed Mix Topping: Use a blend of sesame, flax, and sunflower seeds. ❓ 10 FAQs
1. Can I make the dough ahead of time?
Yes—refrigerate after the first rise and shape the next day. 2. Can I use active dry yeast instead of instant yeast?
Yes—proof in warm water for 5–10 minutes before mixing. 3. Can I use milk instead of water?
Yes—milk makes buns richer and softer. 4. How do I keep buns soft longer?
Store in an airtight container and avoid refrigeration unless freezing. 5. Can I make these vegan?
Yes—replace butter with plant-based margarine and egg with plant-based milk for the wash. 6. Can I double the recipe?
Yes—adjust rise times if needed. 7. Can I skip the egg wash?
Yes—but the buns will be paler and less shiny. 8. How do I make them gluten-free?
Use a gluten-free bread flour blend and add a binder like xanthan gum if not included. 9. Can I add herbs to the dough?
Yes—mix dried oregano, thyme, or rosemary into the dough for flavor. 10. Why are my buns dense?
Over-flouring, under-kneading, or short rising times can cause density. 🏁 Conclusion
These Homemade Burger Buns are the perfect upgrade for any burger night. Soft yet sturdy, slightly sweet yet neutral enough for any filling, they’ll make your homemade burgers taste like they came from a gourmet restaurant. With just a little time and a handful of pantry staples, you can say goodbye to store-bought buns forever.


