A Ghoulishly Cheesy, Ooey-Gooey, Stuffed Skull Recipe That’s Perfect for Trick-or-Treat Nights and Halloween Parties
🎉 Introduction
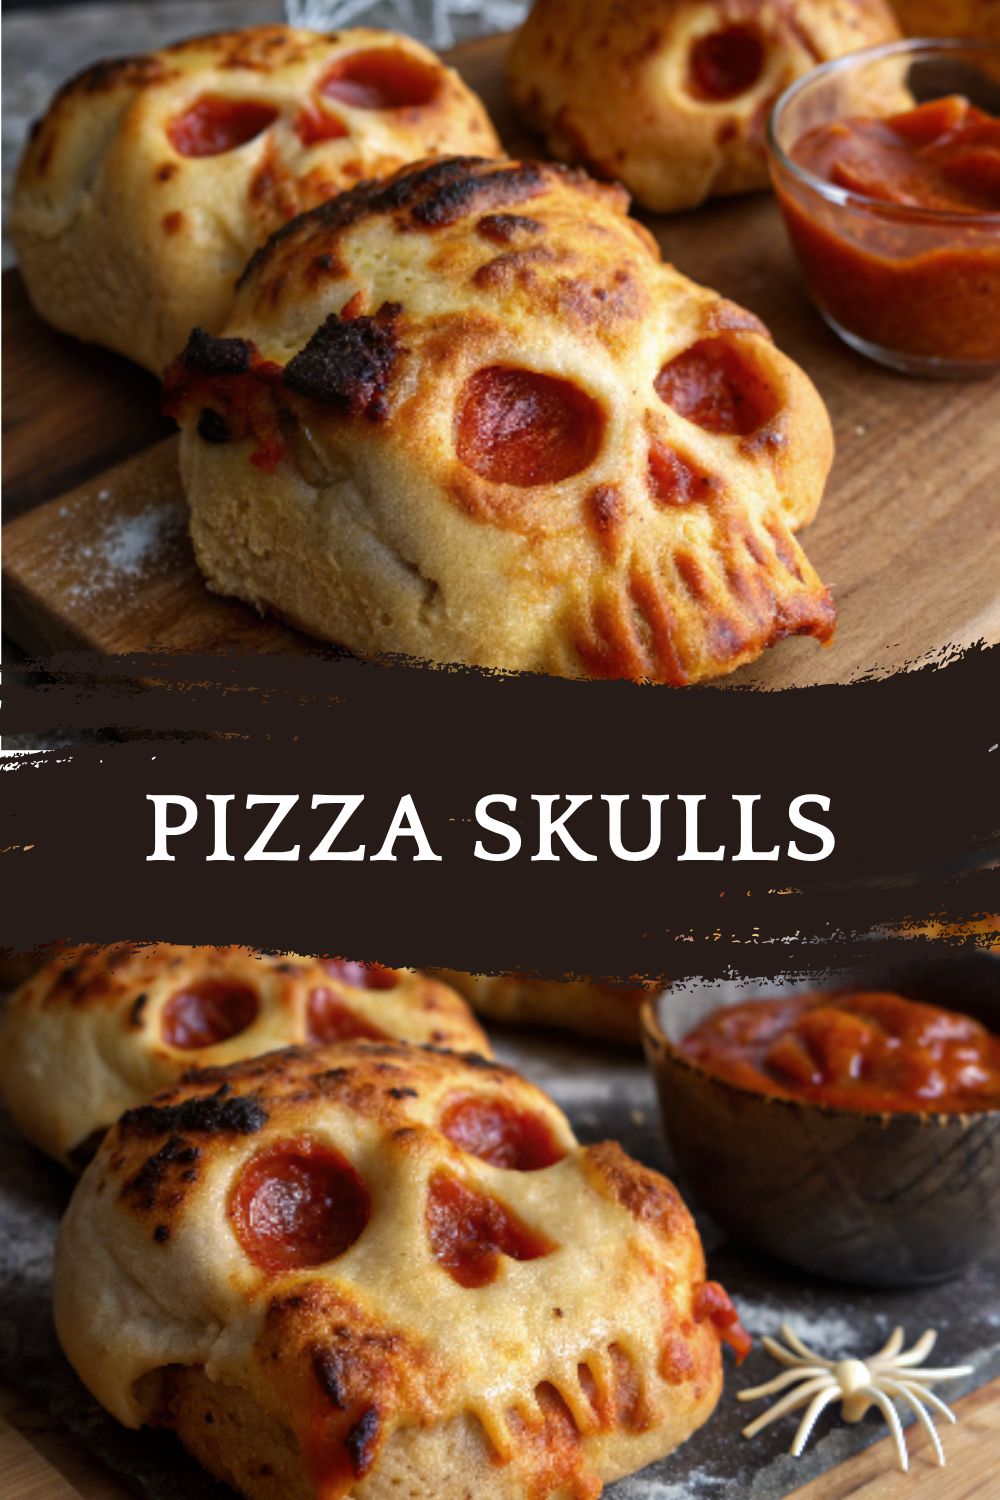
If you’re looking to serve something spectacularly spooky at your next Halloween gathering, these Pizza Skulls are the stuff of fright-night legends. Filled with melty mozzarella, zesty pizza sauce, pepperoni, and black olives, then baked into hauntingly delicious skull shapes, these handheld treats are as creepy as they are comforting.
Made with homemade dough (or a shortcut pizza dough), these skull-shaped delights are shockingly easy to make and even more fun to eat. Perfect for kids, teens, or grown-up ghouls, they’re sure to haunt your Halloween snack table with their cheesy goodness.
Whether you’re throwing a monster bash, planning a spooky movie night, or just feeding your little monsters after school — these Pizza Skulls bring all the eerie charm and classic pizza flavors in a frightfully fun form.
🧰 Equipment Needed
To make these creepy pizza creations, you’ll need:
- Skull-shaped baking mold (metal or silicone)
- Mixing bowls (for dough and toppings)
- Measuring cups and spoons
- Saucepan or microwave-safe bowl (to warm water)
- Whisk or wooden spoon
- Rolling pin (optional)
- Pastry brush
- Oven
🛒 Ingredients
🥩 Meats:
- ½ cup sliced pepperoni (cut into quarters for easier stuffing)
🧂 Condiments:
- ¼ cup chopped black olives (optional for “eye sockets” or decoration)
- 1 cup pizza sauce
🧁 Pantry Items and Spices:
- 1 packet active dry yeast (2¼ tsp)
- 2 cups all-purpose flour
- 1 tsp salt
- 1 tsp sugar
🛢️ Oils and Vinegars:
- 1 tbsp olive oil
🧀 Dairy:
- 1½ cups shredded mozzarella cheese
💧 Liquids:
- 1 cup warm water (110°F or 45°C)
👩🍳 Directions
Step 1: Prepare the Pizza Dough
- In a large bowl, mix warm water and sugar. Sprinkle in yeast and let sit for 5–10 minutes until foamy.
- Stir in flour, salt, and olive oil. Mix until a dough forms.
- Knead the dough on a floured surface for 5 minutes until smooth.
- Cover and let rise in a warm spot for 30–45 minutes until doubled in size.
Shortcut: Use store-bought pizza dough to save time — it works just as well!
Step 2: Preheat and Grease the Skull Molds
- Preheat oven to 375°F (190°C).
- Lightly grease each cavity of the skull mold with olive oil or cooking spray.
Step 3: Divide and Shape the Dough
- Roll dough into 6–7 equal pieces (depending on the size of your mold).
- Flatten each piece into a rough circle about 5–6 inches in diameter.
Step 4: Stuff the Skulls
- Gently press one dough circle into each skull cavity, pressing up the sides.
- Fill with a spoonful of pizza sauce, a sprinkle of cheese, pepperoni, and black olives.
- Add another small layer of cheese to seal it all in.
Step 5: Close and Bake
- Pull the dough edges together and pinch to seal the tops.
- Bake for 15–20 minutes, or until golden brown and puffed.
- Remove from oven and let cool 5 minutes before carefully flipping out of the mold.
Step 6: Optional Decoration
- Brush with garlic butter for extra flavor.
- Add sliced black olives into the eye sockets for a dramatic zombie effect.
- Drizzle with “blood” (pizza sauce) across the top before serving.
🍽️ Servings & Timing
- Servings: 6–7 pizza skulls
- Prep Time: 25 minutes (or 10 minutes with store-bought dough)
- Cook Time: 15–20 minutes
- Total Time: 40–60 minutes (with rising time)
🧊 Storage & Reheating
Refrigerator:
- Store leftovers in an airtight container for up to 3 days.
Freezer:
- Freeze cooled pizza skulls for up to 2 months. Wrap individually in foil or plastic wrap, then store in a ziplock bag.
Reheating:
- Reheat in a 350°F oven for 8–10 minutes or microwave for 1–2 minutes (use paper towel to prevent sogginess).
🥄 Variations
- Mummy Skulls: Use dough strips to create a “wrapped” mummy look across the top.
- Vampire Skulls: Add jalapeños or hot sauce inside for a fiery bite.
- Meatless Skulls: Use mushrooms, spinach, and extra cheese instead of pepperoni.
- Cheeseburger Skulls: Use ground beef, cheddar, and ketchup for a burger-style twist.
- Breakfast Skulls: Scrambled eggs, cooked sausage, and cheddar cheese — spooky brunch!
❓ 10 FAQs
- Do I need a skull mold?
Yes — it gives the distinct shape. You can find metal or silicone molds online or in Halloween stores. - Can I make this with kids?
Absolutely! Let them stuff and decorate their own skulls — it’s a fun family activity. - Is it okay to use canned dough?
Yes! Crescent roll dough, pizza dough, or even biscuit dough all work in a pinch. - What else can I use for filling?
Try cooked sausage, mushrooms, green peppers, or pineapple chunks. - Do the skulls stay crispy?
The outside is golden and soft like pizza crust — brush with oil or butter for extra crispiness. - Can I make these gluten-free?
Yes — use your favorite gluten-free pizza dough. - What’s the best cheese to use?
Mozzarella melts beautifully, but provolone or a pizza blend also works great. - Can I prep them ahead?
You can assemble and refrigerate unbaked skulls for up to 6 hours, then bake fresh. - Can I make mini skulls for kids?
Use mini skull molds and reduce bake time to 10–12 minutes. - How do I serve these at a party?
Place on a tray with a bowl of marinara “blood dip” and creepy décor around.
🏁 Conclusion
These Pizza Skulls are the ultimate spooky snack-meets-savory delight. From the cheesy insides to the eerie outer shell, they’re everything you want in a Halloween party treat — creepy, cheesy, portable, and bursting with flavor.
You can make them your own with endless filling ideas, get creative with decorations, and watch your guests’ eyes light up with surprise and delight as they bite into their very own stuffed skull.
Whether served hot from the oven or packed for a haunted picnic, these frightful little skulls will steal the show — and maybe a few souls.

Pizza Skulls: 7 Spooky Treats for Halloween Fun
Ingredients
Equipment
Method
- In a large bowl, mix warm water and sugar. Sprinkle in yeast and let sit for 5–10 minutes until foamy.
- Stir in flour, salt, and olive oil. Mix until a dough forms.
- Knead the dough on a floured surface for 5 minutes until smooth.
- Cover and let rise in a warm spot for 30–45 minutes until doubled in size.
- Shortcut: Use store-bought pizza dough to save time — it works just as well!
- Preheat oven to 375°F (190°C).
- Lightly grease each cavity of the skull mold with olive oil or cooking spray.
- Roll dough into 6–7 equal pieces (depending on the size of your mold).
- Flatten each piece into a rough circle about 5–6 inches in diameter.
- Gently press one dough circle into each skull cavity, pressing up the sides.
- Fill with a spoonful of pizza sauce, a sprinkle of cheese, pepperoni, and black olives.
- Add another small layer of cheese to seal it all in.
- Pull the dough edges together and pinch to seal the tops.
- Bake for 15–20 minutes, or until golden brown and puffed.
- Remove from oven and let cool 5 minutes before carefully flipping out of the mold.
- Brush with garlic butter for extra flavor.
- Add sliced black olives into the eye sockets for a dramatic zombie effect.
- Drizzle with “blood” (pizza sauce) across the top before serving.
Notes
Yes — it gives the distinct shape. You can find metal or silicone molds online or in Halloween stores. Can I make this with kids?
Absolutely! Let them stuff and decorate their own skulls — it’s a fun family activity. Is it okay to use canned dough?
Yes! Crescent roll dough, pizza dough, or even biscuit dough all work in a pinch. What else can I use for filling?
Try cooked sausage, mushrooms, green peppers, or pineapple chunks. Do the skulls stay crispy?
The outside is golden and soft like pizza crust — brush with oil or butter for extra crispiness. Can I make these gluten-free?
Yes — use your favorite gluten-free pizza dough. What’s the best cheese to use?
Mozzarella melts beautifully, but provolone or a pizza blend also works great. Can I prep them ahead?
You can assemble and refrigerate unbaked skulls for up to 6 hours, then bake fresh. Can I make mini skulls for kids?
Use mini skull molds and reduce bake time to 10–12 minutes. How do I serve these at a party?
Place on a tray with a bowl of marinara “blood dip” and creepy décor around. 🏁 Conclusion These Pizza Skulls are the ultimate spooky snack-meets-savory delight. From the cheesy insides to the eerie outer shell, they’re everything you want in a Halloween party treat — creepy, cheesy, portable, and bursting with flavor. You can make them your own with endless filling ideas, get creative with decorations, and watch your guests’ eyes light up with surprise and delight as they bite into their very own stuffed skull. Whether served hot from the oven or packed for a haunted picnic, these frightful little skulls will steal the show — and maybe a few souls.


