Ingredients
Equipment
Method
Step 1: Preheat your oven to 350°F (175°C) and line baking sheets with parchment paper.
Step 2: In a large bowl, cream together butter, peanut butter, brown sugar, and granulated sugar until light and fluffy.
Step 3: Beat in the egg and vanilla extract until well combined.
Step 4: In a separate bowl, whisk together flour, baking soda, and baking powder. Gradually add the dry mixture into the wet ingredients, mixing until dough forms.
Step 5: Roll the dough into 1-inch balls and place them on the prepared baking sheets, about 2 inches apart.
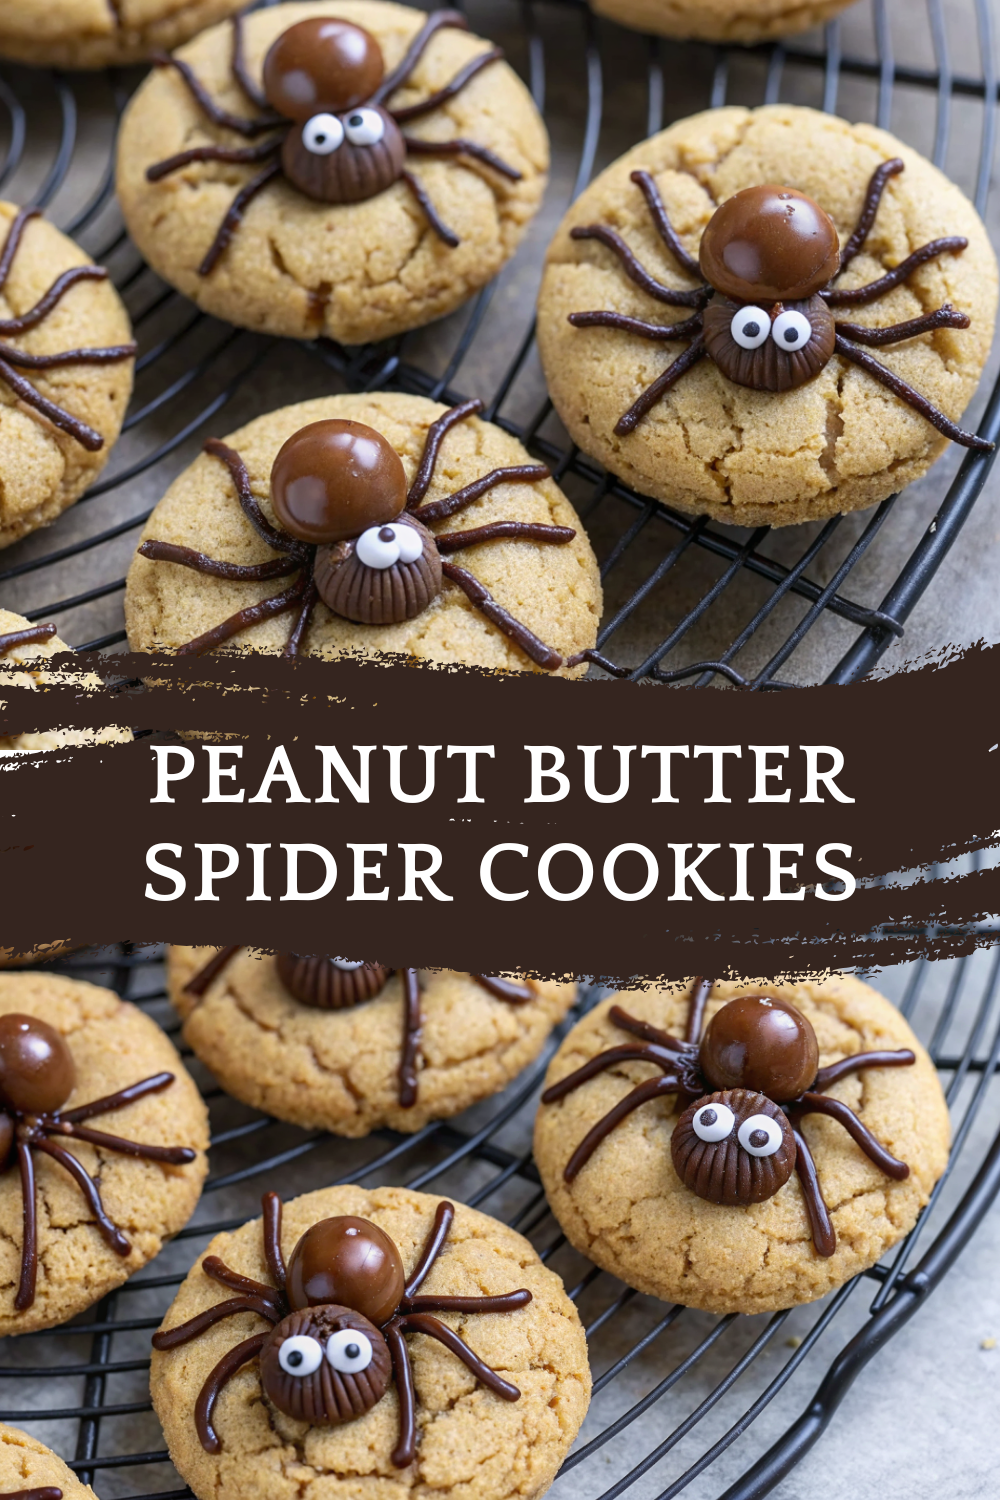
Step 6: Bake for 8–10 minutes, until edges are lightly golden. Remove from oven and immediately press a Whopper candy into the center of each cookie. Transfer cookies to a wire rack to cool completely.
Step 7: Melt the chocolate chips in a microwave-safe bowl in 20-second intervals, stirring until smooth. Transfer to a piping bag or use a spoon.
Step 8: Pipe four small chocolate “legs” on each side of the Whopper to create a spider effect.
Step 9: Use the white decorating gel to dot two small eyes on each Whopper. Optionally, add mini chocolate chip pupils for extra detail.
Step 10: Let the chocolate set, then serve your spooky spider cookies!
Notes
🧊 Storage & Reheating
Room temperature: Store in an airtight container for up to 5 days.
Refrigerator: Store for up to 1 week, though cookies may firm up.
Freezer: Freeze undecorated cookies for up to 2 months. Decorate after thawing.
Reheating: Warm briefly in the microwave (10–15 seconds) for a soft cookie.
🥄 Variations
Chocolate base: Use chocolate cookie dough instead of peanut butter.
Nut-free option: Replace peanut butter with sunflower seed butter.
Candy swap: Use peanut butter cups or chocolate truffles instead of Whoppers.
Colorful spiders: Add orange or green gel eyes for extra Halloween flair.
Mini spiders: Use mini malted balls for bite-sized spooky cookies.
❓ 10 FAQs
Do I need to chill the dough?
– Not for this recipe, but you can for thicker cookies. Can I use crunchy peanut butter?
– Yes, but creamy makes the cookies smoother. What if I don’t have Whoppers?
– Use Maltesers, mini peanut butter cups, or any round chocolate candy. Can I make the dough ahead of time?
– Yes, refrigerate for up to 48 hours before baking. Can I freeze baked cookies?
– Yes, freeze undecorated cookies and decorate after thawing. Do I need a piping bag for the legs?
– No, a zip-top bag with the corner snipped works. Can kids help decorate?
– Absolutely, this is a perfect family-friendly baking activity. How do I stop cookies from spreading too much?
– Don’t over-soften the butter and avoid over-mixing. Can I make them gluten-free?
– Yes, use a 1:1 gluten-free flour blend. Do the candy eyes stick well?
– Yes, the gel works as glue. You can also use melted chocolate as adhesive. 🏁 Conclusion
These Peanut Butter Spider Cookies are the ultimate Halloween treat—fun to decorate, delicious to eat, and perfect for spooky parties. With chewy peanut butter cookies as the base and chocolatey spiders crawling on top, they’re a festive twist on classic cookies. Make them with kids, share them at gatherings, or enjoy them as a Halloween night dessert—either way, they’re guaranteed to be a hit!