Ingredients
Equipment
Method
Step 1: Preheat & Prep
- Preheat your oven to 350°F (175°C).
- Line a baking pan with parchment paper, leaving some overhang for easy removal later.
- Lightly grease the parchment to prevent sticking.
Step 2: Combine the Wet Ingredients
- In a large mixing bowl, whisk together coconut oil (or melted butter), sugar, and vanilla extract until smooth.
- Add the eggs one at a time, whisking well after each addition until glossy and combined.
Step 3: Add the Dry Ingredients
- Sift in flour, cocoa powder, and salt directly into the wet mixture.
- Fold gently with a spatula until just combined — don’t overmix!
- Stir in the semi-sweet chocolate chips for extra fudgy texture.
Step 4: Bake the Brownies
- Pour the batter into the prepared pan and smooth the top evenly.
- Bake for 25–30 minutes, or until a toothpick inserted in the center comes out with just a few moist crumbs.
- Allow the brownies to cool completely on a rack before decorating.
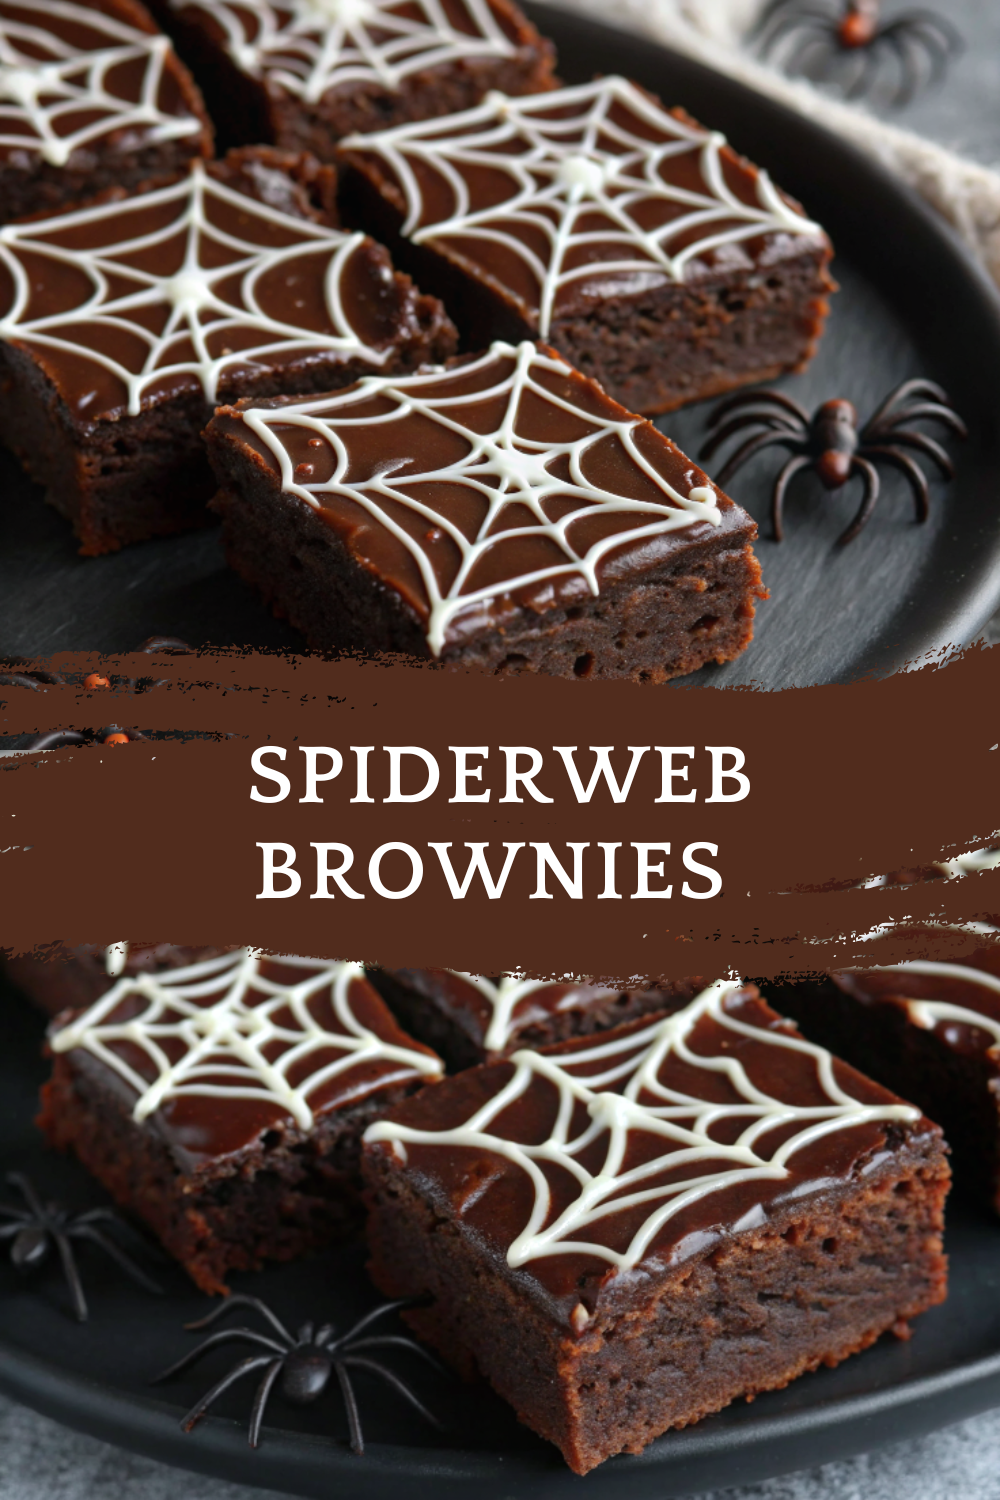
Step 5: Create the Spiderweb Design
- In a microwave-safe bowl, combine white chocolate chips and heavy cream.
- Microwave in 15-second bursts, stirring between each, until smooth and glossy.
- Pour the melted white chocolate into a piping bag or ziplock bag with a small corner cut off.
- Pipe 3–4 concentric circles (like a target) on top of the cooled brownies.
- Using a toothpick, drag lines from the center outward to create a perfect spiderweb effect! 🕸️
Step 6: Chill & Slice
- Refrigerate for 15–20 minutes to set the white chocolate design.
- Slice into squares or rectangles and serve your spooky delights!
Notes
🧊 Storage & Reheating
Storage:
Store brownies in an airtight container at room temperature for up to 4 days, or refrigerate for up to a week.
Freezing:
Freeze undecorated brownies for up to 2 months. Thaw before adding the spiderweb design.
Reheating:
Warm in the microwave for 10–15 seconds for a just-baked fudgy texture.
🥄 Variations
Dark Spiderwebs: Reverse it! Use black cocoa brownies and pipe white chocolate webs.
Bloody Webs: Swirl raspberry jam with white chocolate for a gory (and delicious) twist.
Nutty Webs: Add walnuts, pecans, or hazelnuts to the batter for extra crunch.
Salted Caramel Webs: Replace white chocolate with a drizzle of caramel sauce and sprinkle sea salt on top.
Gluten-Free Option: Use a 1:1 gluten-free flour blend.
Vegan Option: Substitute flax eggs, vegan chocolate, and coconut cream.
Each variation adds a hauntingly delicious twist to this Halloween classic! 👻🍫
❓ 10 FAQs
Can I use butter instead of coconut oil?
Yes! Unsalted butter gives a richer flavor. Can I use natural cocoa powder?
Dutch-process cocoa gives better color and depth, but natural cocoa works too. How do I make the web if I don’t have a piping bag?
Use a small plastic sandwich bag and snip off a tiny corner. How do I know when my brownies are done?
The center should be just set — don’t overbake or they’ll lose that fudgy texture. Can I double this recipe?
Yes — bake in a 9x13-inch pan for about 35–40 minutes. Can I use milk chocolate instead of semi-sweet?
Sure! Just reduce sugar slightly to balance sweetness. How can I make my brownies extra fudgy?
Use less flour (¾ cup) and bake slightly under time. Can I decorate with something other than white chocolate?
Yes — try royal icing, cream cheese frosting, or colored candy melts. Do I need to chill before slicing?
Yes, chilling helps the web set and gives cleaner cuts. Can I add toppings before baking?
Definitely! Sprinkle mini chocolate chips or Halloween sprinkles on top before baking. 🏁 Conclusion These Spiderweb Brownies are fudgy, fun, and frighteningly good! 🕸️💀
With their deep chocolate flavor and spooky white chocolate web, they’re the perfect Halloween treat for kids, party guests, or any chocolate lover. They’re quick to make, fun to decorate, and guaranteed to steal the spotlight on your Halloween dessert table. One bite of these decadent brownies and you’ll be caught in their delicious web forever!